User Guide
This guide explains how to use the iTop Portal as a regular user. It covers key features available for managing incidents and service requests efficiently, once the portal has been installed and configured. For installation instructions, refer to the Installation Guide.
Logging In

To access the portal, follow these steps:
- Open your web browser and navigate to the portal’s URL (e.g.,
http://localhost:8000or your domain likehttps://yourdomain.com/portal.debian). - If you are not authenticated, you will be automatically redirected to the login page.
- Enter your credentials:
- Email: Your registered email address (provided by the administrator).
- Password: The password assigned to your account (contact your administrator if you need to reset it).
- Click the Login button to submit your credentials.
- If valid, you will be redirected to the dashboard or your default user page. If not, an error message will appear (e.g., "Invalid credentials").
Note: The login process uses Laravel’s built-in authentication, enhanced with Spatie for role-based access. Ensure your account is linked to the correct iTop instance as defined in the user settings.
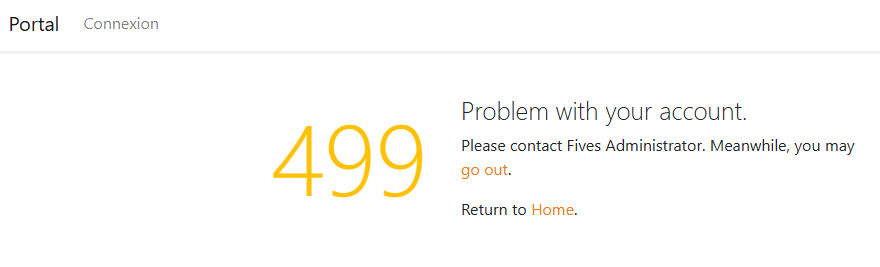
To interact with iTop (and thus use this portal), each account must be linked to an iTop account. This link is established using the itop_id attribute of the Portal's User table, which must correspond to the ID attribute of the iTop Contact object.
If the link is missing, you will see the following error:
Troubleshooting Login Issues
If you encounter issues, here are some steps to resolve them:
- Forgot Password: If enabled, use the "Forgot Password" link on the login page to reset your password (requires email configuration in
.env). - Account Not Found: Contact your administrator to verify if your account is synchronized with iTop.
- Session Issues: Clear your browser cache or log out and log back in.
- Debug Mode: If you have admin access, check the Laravel logs (
storage/logs/laravel.log) for error details.
Using Spatie Roles and Permissions
The portal uses Spatie’s laravel-permission package to manage user roles and permissions. Your access to various features depends on your assigned role (e.g., User, Admin). Some sections may only be accessible by administrators.
- Only users with valid roles can access restricted areas (e.g., admin features).
- Administrators can assign roles via the Administrator Guide.
Tip: To test login with different roles, ask your administrator to create test accounts with specific permissions.
Creating a Ticket
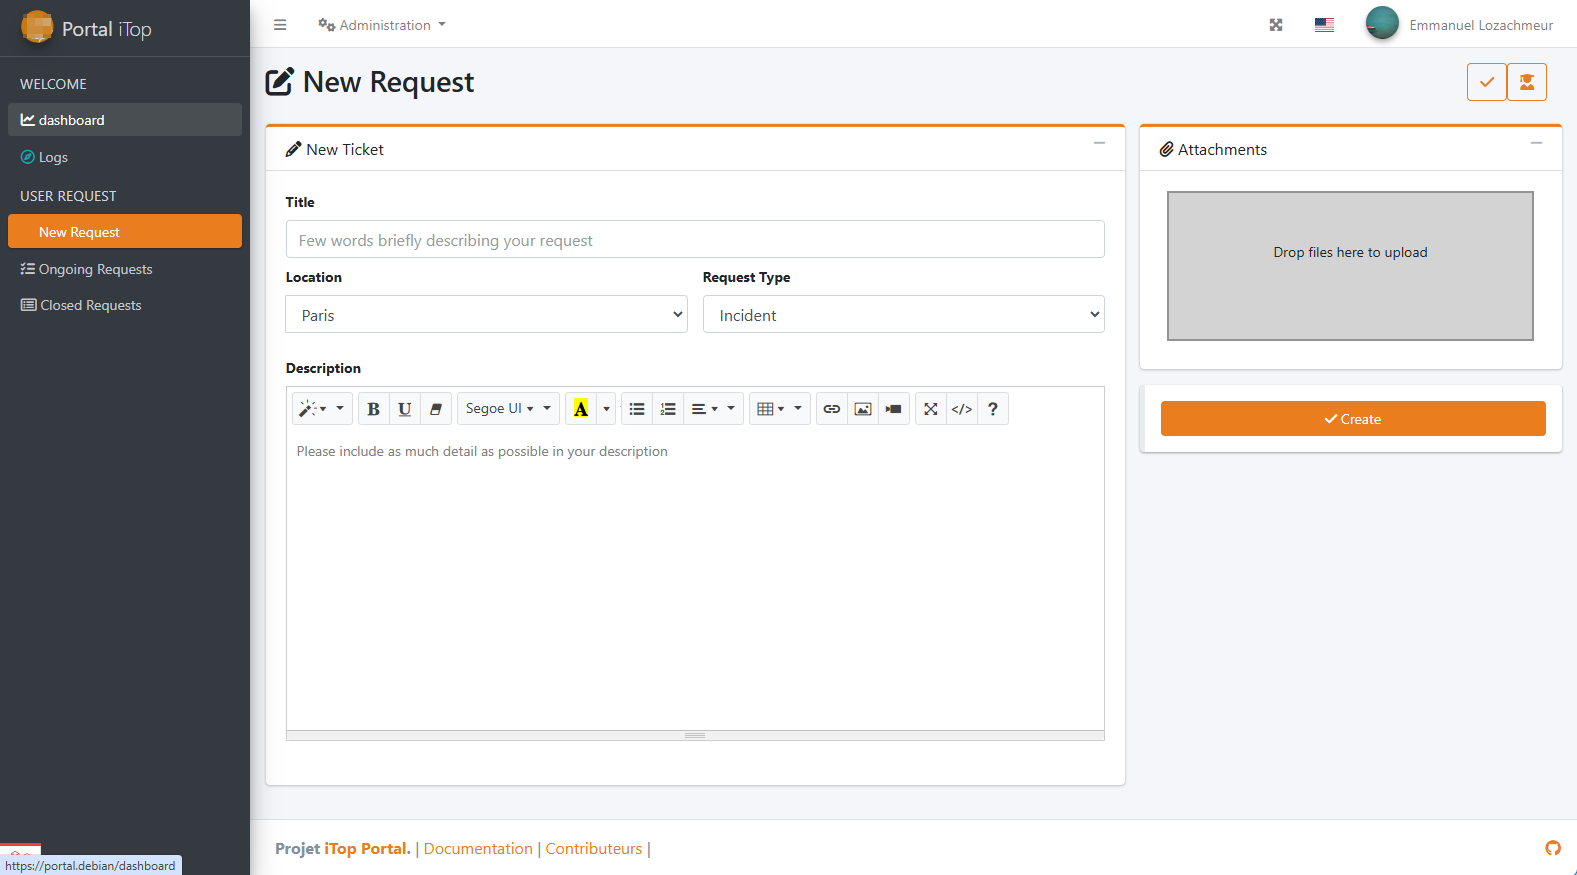
To create a new ticket in the iTop Portal:
- Navigate to the "Create Ticket" section (available in the main menu or dashboard).
- Fill out the form with the following details:
- Title: A concise and clear title for your issue or request.
- Location: Specify the relevant location.
- Request Type: Choose between Incident or Service Request.
- Description: Provide a detailed explanation of the issue or need.
- Attachment: (Optional) Add any relevant files or screenshots.
- Click Submit to create the ticket. The ticket will be registered in the linked iTop instance.
Ongoing Requests
You can easily track your open tickets. In the Open Tickets section, all non-closed tickets are listed with key statistics that can be used as filters. For instance, clicking on a priority level will show only tickets of that priority.
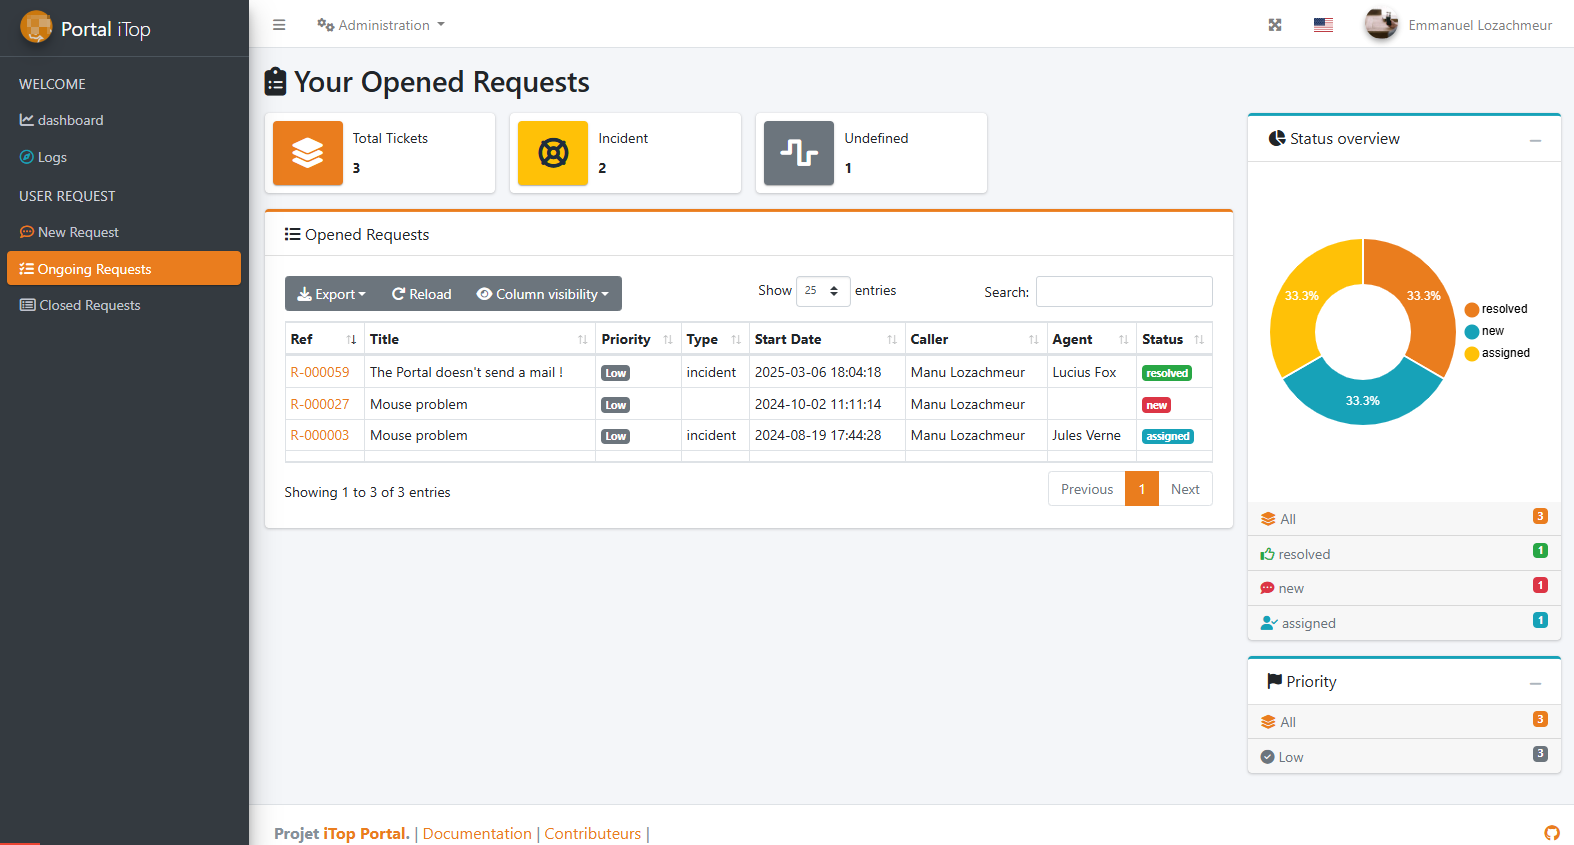 Clicking on a ticket lets you view its details:
- The First Tab displays the description, status, and resolution code (if resolved), along with a text box to add logs to the ticket.
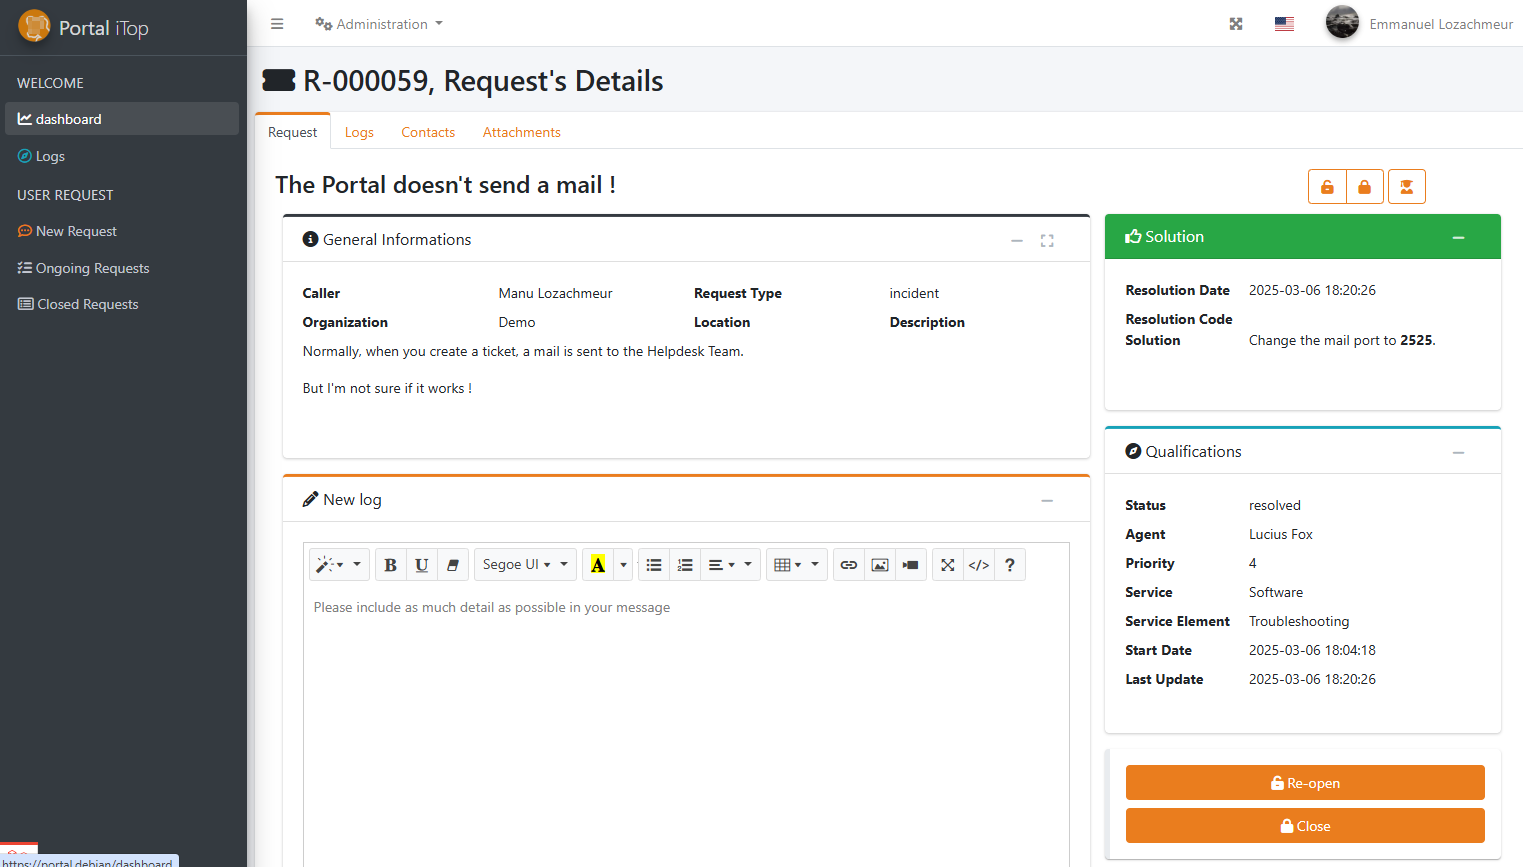
- The Log Tab contains all exchanges related to the ticket, including its timeline.

- The Contacts Tab allows you to view or add contacts related to the ticket.
- The Attachments Tab lets you add or view file attachments.
Note: Available actions depend on the ticket's lifecycle.
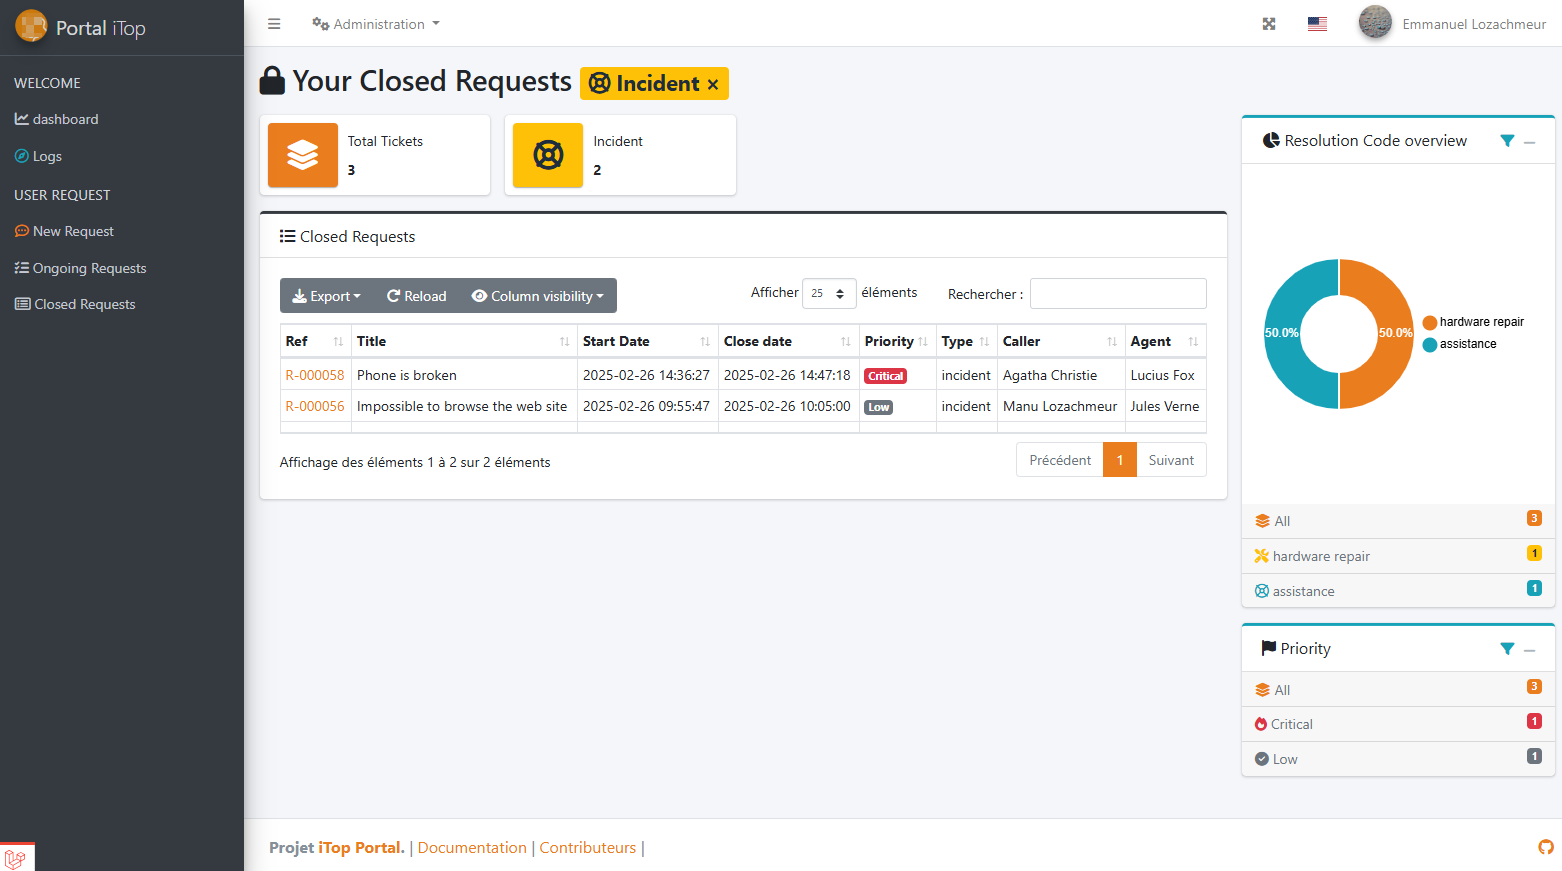
Closed Requests
Closed requests can be found in the Closed Requests section. This section is similar to the Open Tickets section, but since the tickets are closed, further interactions are no longer possible.
Key statistics are available for filtering, and you can still view detailed information about each request.
For additional support, check the Issues & Bugs (Coming soon) page.